| 1. |
 |
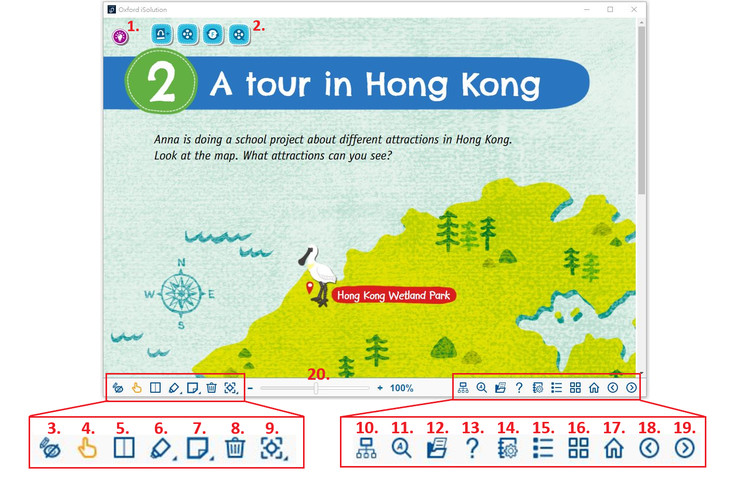
Teaching notes : Hide or show the teaching notes on the page. |
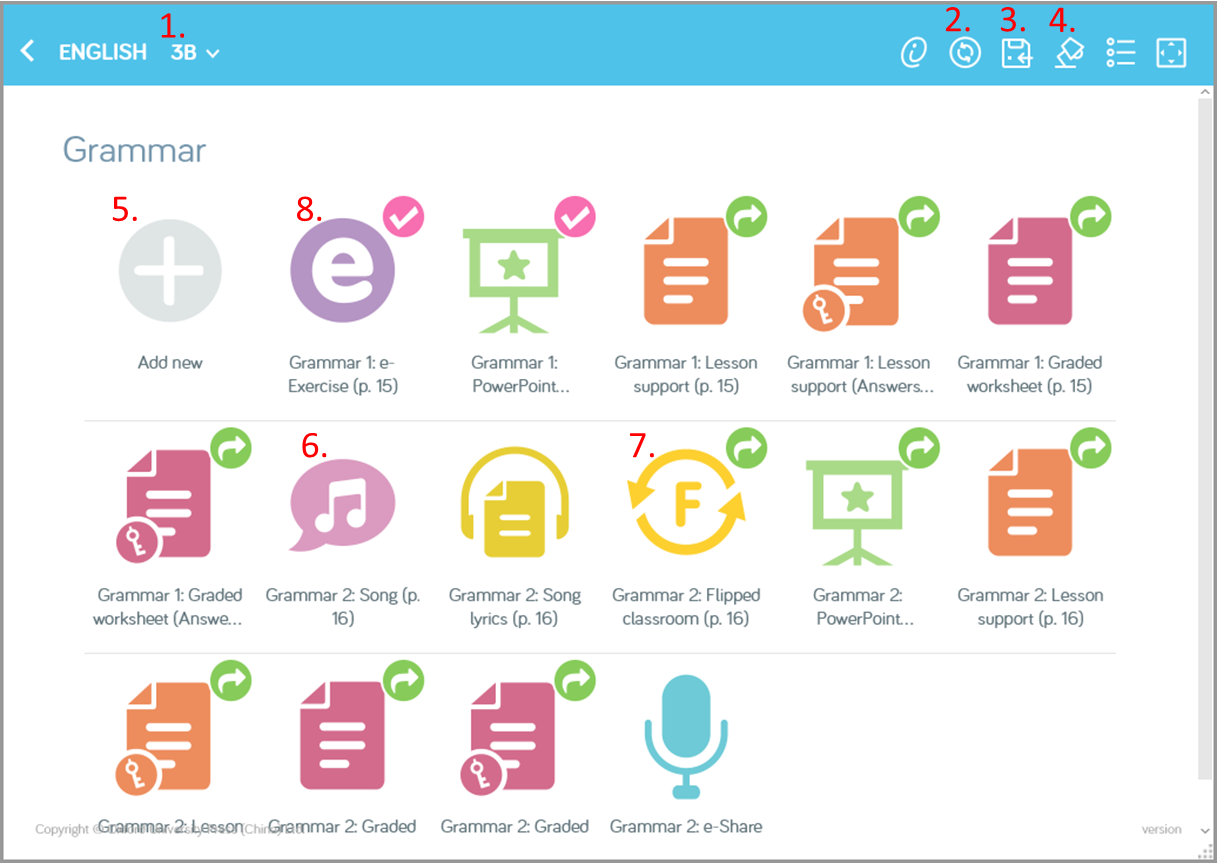
| 2. |
 |
Resources : View the teaching and learning resources of the book, e.g. e-exercises, videos, mini-games. |
| 3. |
 |
Hide annotations : Hide the annotations, such as drawings and sticky notes on the page. |
| |
 |
Show annotations : Show the annotations on the page. |
| 4. |
 |
Default navigation : Drag & drop the e-book page. |
| 5. |
 |
Two page view : Change to double-page spread view. |
| |
 |
Single page view : Change to single-page view. |
| 6. |
 |
Marking tools : Click to reveal these four buttons.
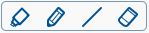 |
| |
 |
Highlighter : Use highlighter on the page. |
| |
 |
Drawing pen : Use drawing pen on the page. |
| |
 |
Line Tool : Use line tool on the page. |
| |
 |
Eraser : Remove highlights and drawings on the page. |
| 7. |
 |
Bookmarking tools : Click to reveal these four buttons.
|
| |
 |
Sticky note : Add a sticky note on page. |
| |
 |
Add resources : Insert your own resources to e-Textbook. |
| |
 |
Bookmark : Bookmark a page. |
| |
 |
Whiteboard : Draw and write on the on-page whiteboard. |
| 8. |
 |
Delete all : Clear the users' markings and resources on the page.

|
| 9. |
 |
Viewing options : View the current page in different ways.
 |
| |
 |
Focal zoom : Zoom in or out by using the mouse wheel. |
| |
 |
Zoom to area : Zoom into area by using the mouse cursor. |
| |
 |
Fit to width : Resize the page to fit the width of the window. |
| |
 |
Fit to height : Resize the page to fit the height of the window. |
| 10. |
 |
Mobile Device Management : Switch the Multi-devices management mode on or off. Switch on for classroom management. |
| |
 |
Black screen : Locked up all connected student devices into black screen. |
| |
 |
Page-flip control : The student devices will go to the same screen/page that is on the teacher device. |
| |
 |
Students' status : To see students’ MDM connection status. An orange dot next to the name means they are not connected, while a green dot means they are connected. |
| 11. |
 |
Keyword search : Search for a specific word in the book. |
| 12. |
 |
Other resources : Extra learning resources of the e-Textbook, such as online dictionary. |
| 13. |
 |
User guide : Open the iSolution user guide in browser. |
| 14. |
 |
Reading and other tools : Listen to the reading passage with text highlighted on the page. |
| 15. |
 |
Table of contents : Open table of contents of the book unit. |
| 16. |
 |
Thumbnail view : Navigate through the pages with thumbnail images. |
| 17. |
 |
Home : Return to the table of contents page of the module. |
| 18. |
 |
Previous page : Turn to the previous page. |
| 19. |
 |
Next page : Turn to the next page. |
| 20. |
 |
Zoom bar : Use to zoom in or out the page. |